Nowadays, white LED lighting has been put into practical use and industrialization. Its light efficiency has surpassed that of traditional incandescent lamps and fluorescent lamps, which fully demonstrates the characteristics of energy saving and environmental protection. With the increasing application of LED lighting, its reliability has attracted more and more attention. In the face of fierce market competition, the industry is eager to introduce a set of LED reliability standards, which can not only be used to evaluate the reliability of LEDs, but also to identify the pros and cons of products and ensure the healthy and orderly development of China's LED industry. It is not known that many reliability standards for some electronic components (including semiconductor devices) and their applications are also applicable to LEDs. In view of this situation, it is necessary to introduce to you a brief introduction to several electronic component standards that can be used for LED reliability evaluation, so as to guide everyone to learn and master, and to apply it to LEDs. These standards have been published for a long time. The time span has been around 30 years since the 1980s. As a traditional standard, it has been tested by time and practice for many years. Some of the standards introduced here are completely applicable to LEDs, and some can be used as reference and basis for the development of LED related standards.
1. General rules for accelerated life testing of electronic components (GB 2689.1-81 for short)
This standard is used to quantitatively evaluate the reliability of electronic components. When developing product technical standards with reliability requirements, it can provide a uniform method for testing products. Electronic components, especially semiconductor devices, have a working life of hundreds of thousands of hours. To obtain life values, thermal acceleration is generally used. This is called accelerated life testing. The “General Provisions†specify the implementation details of the thermal accelerated life test, which includes: sampling, test stress, determination of failure time, parameter test, failure analysis, failure validity judgment, data processing, test report, and so on. These are fully applicable to LED devices.
2. Method for estimating the life of electronic components (GB 2689.3-81 and GB 2689.4-81)
The standard specifies the methods and procedures for data processing of accelerated life test of electronic components. It is divided into simple linear unbiased estimation and best linear unbiased estimation according to the number of samples. Since the test is in the wear failure period of the device, it can be terminated until the specified number of failures is reached, so it is also called "fixed censoring". Using this method, a number of reliability parameters such as average life, failure rate, and activation energy of the device can be obtained. This is a commonly used method for evaluating the life of electronic components in engineering, and is also applicable to LED devices.
3. Evaluation method for durability of semiconductor devices (GB/T 4589.1-2006)
This standard is part of the International Electrotechnical Commission's electronic component quality assessment system, which specifies the general procedures and general principles for the quality assessment of semiconductor devices, including durability testing. According to the batch allowable failure rate sampling, the durability of the LED device refers to the number of failures allowed by the LED device at a given ambient temperature within a given time. If the number of allowed failures is exceeded, it is judged as unqualified (rejected) ). Since the test is performed within a given time, the test is terminated as soon as the time is up, so it is also called timing censoring. This method can evaluate device quality in a short period of time. The durability of LED devices is mainly reflected in the degradation of light output (light flux, color temperature, color rendering index, color tolerance, etc.) at a given ambient temperature for a given period of time.
4. Evaluation method for life of LED application products (GB 5080.4-85)
This method is used for reliability evaluation of electronic equipment, but the time-finalized method in this standard can be used to obtain the average fault-free life and failure rate of LED application products, and to obtain the life lower limit value at a given confidence level.
5. Graph estimation method for LED device life test (GB 2689.2-81)
This standard is mainly used to judge whether the life test data of the censored tail is abnormal or whether the data processing result is correct. The engineering commonly used is the Weibull distribution graph estimation method. As a tool to judge whether the test is correct, it has strong universality, and it is obviously applicable to LED devices. The graph estimation method using the Weibull distribution is a basic skill that must be mastered by technicians engaged in LED life testing.
Years of practice have shown that the above five standards are feasible from device to application, and have become the basis for the development of product standards and technical specifications by component manufacturers in the electronics industry. The evaluation of the reliability of LEDs is also applicable. For those who are eager to introduce LED reliability standards, it is recommended that these standards be thoroughly understood and thoroughly learned. The above five electronic component reliability standards can not only play a role in the development of LED reliability standards, but also become a regulation to purify the LED market together with the published LED standards. It is believed that with the advancement and development of LED technology, on the basis of traditional standards, there will be more new LED standards and national standards to protect the healthy and orderly development of the LED industry.
Digital Timer
Instruction Manual
1. Features
Clock display, 10 sets of adjustable timed power control, randomized power control, manual switch and optional DST setup.
2. First time charging
This Timer contains a rechargeable battery. It is normal that the new/old model runs out of battery if it wasn`t being charged for a long period of time. In this case, the screen will not turn on.
To charge : simply plug the timer to a power outlet. The charging time should take at least 15 minutes.
If the screen doesn`t light up or displays garbled characters, simply reboot the system by pressing the [RESET" button.
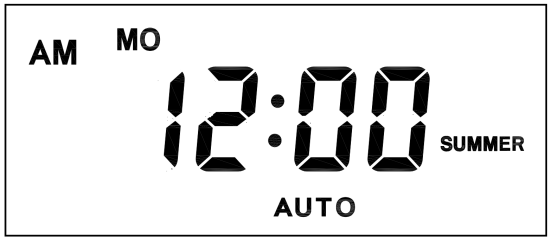
3. Set clock

Hold [CLOCK" button and [WEEK" button to adjust week.
Hold [CLOCK" button and [HOUR" button to adjust hour.
Hold [CLOCK" button and [MINUTE" button to adjust minute.
Hold [CLOCK" button and [TIMER" button to select 12 hour/24 hour display.
Hold [CLOCK" button and [ON/AUTO/OFF" button to enable/disable DST (daylight-saving-time).
4. Set timer
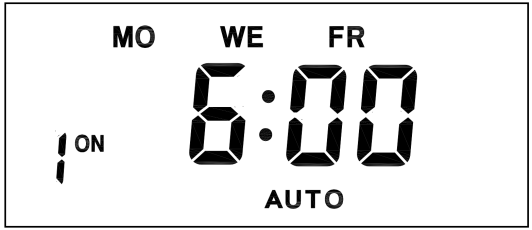
Press [TIMER" button, select and set timer. Setting rotation : 1on, 1off, 2on, 2off, ...... , 10on, 10off.
Press [HOUR" button to set hour for timer.
Press [MIN" button to set minute for timer.
Press [WEEK" button to set weekday for timer. Multiple weekdays can be selected. ex: if selected [MO", the timer will only apply on every Monday; if selected [ MO, WE, FR", the timer will apply on every Monday, Wednesday and Friday.

Press [RES/RCL" button to cancel the selected on or off timer. The screen will show "-- -- : -- --" , the timer is canceled.
Press [RES/RCL" button again to reactivate the timer.

When timers are set, press [CLOCK" to quit timer setting and return to clock.
5. Random function

Press [RANDOM" button to activate random function, press again to cancel function.
System only runs random function when [AUTO" is on.
Random function will automatically start the timer from 2 to 32 minutes after the setting.
ex : if timer 1on was set to 19:30 with the random function on, the timer will activate randomly between 19:33 to 20:03.
if timer 1off was set to 23:00 with the random function on, the timer will activate randomly between 23:02 to 23:32.
To avoid overlapping, make sure to leave a minimum of 31 minutes gap between different sets of timer.
6. Manual control
Displayed features:
ON : socket turns on.
OFF : socket turns off.
AUTO : socket turns on/off automatically via timer.
Manual ON setting
Press [ON/AUTO/OFF" button to switch from [AUTO" to [ON".
This mode allows socket of the device to power up. Power indicator will light up.
Manual OFF setting
Press [ON/AUTO/OFF" button to switch from [AUTO" to [OFF".
This mode turns socket of the device off. Power indicators will turn off.
7. Electrical parameters
Operating voltage : 230VAC
Battery : NiMh 1.2V
Power consumption : < 0.9W
Response time : 1 minute
Power output : 230VAC/16A/3680W
Q&A
Q: Why won`t my timer turn on?
A: It`s out of battery, you can charge the timer by plugging onto any power outlet. Charge the device for at least 15 minutes. Then press [RESET " button to reset the device.
Q: Can I set seconds of the timer?
A: No, the smallest time unit is minute.
Q: Does my timer keeps old settings without being plugged onto a power outlet?
A: Yes, the timer has an internal battery, it allows the timer to save settings without a power outlet.
Q: Is the battery rechargeable?
A: Yes, the battery is rechargeable. We recommend to charge it for 4 hours so the battery is fully charged.
Q: Does the timer needs internet connection?
A: The timer does not need internet.
Q: Does the screen have back light function?
A: It doesn`t support back light.
digital timer, digital timer socket, electronic timer socket, timer socket
NINGBO COWELL ELECTRONICS & TECHNOLOGY CO., LTD , https://www.cowellsocket.com


